

AI Chatbots for Web Apps: Build and Integrate with Ease
- Aug 17, 2025
- 8 min read
AI chatbots are transforming how websites and web applications interact with users, providing instant support, personalized experiences, and improved engagement. In this guide, we will explore how to build and integrate an AI chatbot into a web app using Python, Flask, JavaScript, HTML, and CSS. By combining backend logic, dynamic front-end interactions, and intuitive styling, we can create a responsive, intelligent chat interface that enhances user experience. This step-by-step approach covers everything needed for a smooth and practical integration process.
Introduction: Building and Integrating AI Chatbots in Web Apps
AI chatbots are revolutionizing the way websites and web applications interact with users. They provide instant support, answer queries, and create engaging, personalized experiences. Integrating a chatbot into your web app not only improves user satisfaction but also streamlines communication and automates repetitive tasks. In this guide, we explore how to build and integrate an AI chatbot using Python, Flask, JavaScript, HTML, and CSS, giving you a practical roadmap for creating an intelligent, responsive chat interface. Key benefits of integrating an AI Chatbot:
Instant User Support: Provide 24/7 assistance to users without manual intervention.
Enhanced Engagement: Keep visitors engaged with dynamic, interactive conversations.
Automation of Repetitive Tasks: Reduce workload by automating FAQs and common queries.
Seamless User Experience: Deliver personalized, responsive interactions that feel natural.
Cross-Platform Compatibility: Use standard web technologies to ensure your chatbot works across devices.
By following this guide, we will break down each step of the integration process—from setting up the backend with Python and Flask to implementing interactive front-end behavior using JavaScript and styling with HTML/CSS. The goal is to create a chatbot that is not only functional but also intuitive, improving the overall user experience on your web app.
Hands-On Guide: Integrating the Gemini AI Chatbot
In this post, we will focus specifically on integrating the Gemini AI chatbot into a web app, providing a practical, step-by-step approach. This guide assumes that the initial setup of your web application is already complete. If your project environment isn’t ready yet, you can refer to this blog for a complete walkthrough on setting up the backend, front-end scaffolding, and project structure.
What This Integration Covers:
Connecting Gemini AI to the Backend: Learn how to securely integrate the chatbot API with your server so it can process and respond to user messages.
Setting Up Routes and APIs: Configure endpoints in your backend to handle incoming chat messages and send responses efficiently.
Real-Time Communication: Ensure smooth data flow between the front-end and backend for instant user feedback.
By the end of this guide, your web app will feature a fully functional Gemini AI chatbot capable of handling real-time conversations. This hands-on approach keeps the focus on practical implementation, making it easy for developers to follow and quickly integrate AI-powered chat functionality into their web applications.
Step 1 - Folder Structure for the Flask AI Chatbot Integration
Before we dive into the code, let's briefly introduce the two core technologies we'll be using: Flask and Google's Gemini. Flask is a lightweight and flexible web framework for Python. Its simplicity makes it an excellent choice for building small to medium-sized applications, like our AI chatbot backend. Gemini is a family of powerful, multimodal AI models from Google. By integrating Gemini, we can equip our website with conversational AI capabilities, allowing it to understand user queries and generate human-like responses.
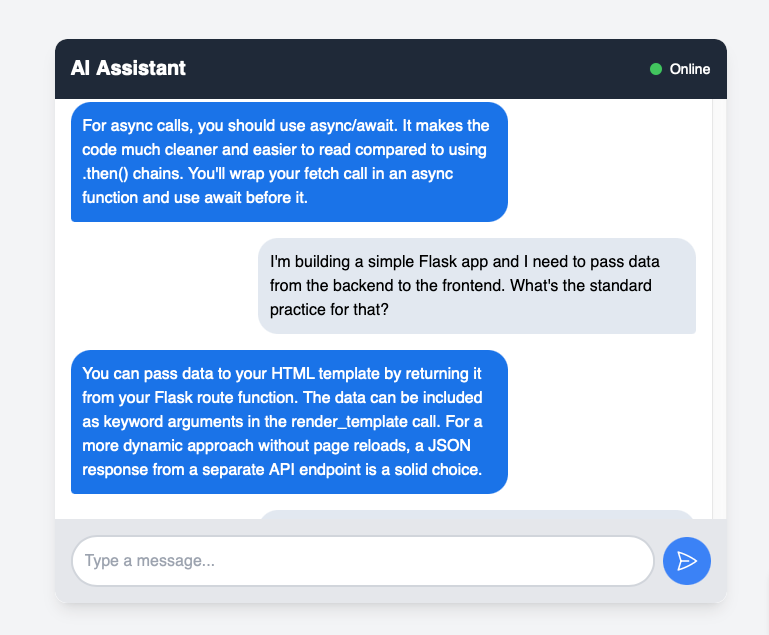
For this tutorial, the website's frontend design, including the chatbox, is already complete. Our focus will be solely on the backend integration and data handling. We'll connect our Flask application to the Gemini API to bring our chatbot to life.
Here’s the current structure of our Flask project:
ai-Chatbot
├── static/
│   ├── css/
│   ├── js/
│   └── images/
├── templates/
│   └── index.html
├── .DS_Store
├── .gitignore
├── app.py
├── requirements.txt
└── README.md
This project follows a standard and logical structure for a Flask application. Each file and folder has a specific purpose that helps keep our code organized and maintainable.
static/: This directory is crucial for serving all the static assets of our website. Since your frontend design is already complete, this is where you'd find your CSS files for styling, JavaScript files for interactive chatbox behavior, and any images or other media.
templates/: Flask uses a templating engine (Jinja2) to render HTML pages. The templates folder contains all the HTML files for our web pages, such as index.html, which would be the main page where the chatbox is located.
app.py: This is the heart of our Flask application. It's the main file where we'll write our backend logic. This is where we will define the routes for our web pages, handle data sent from the frontend (like user messages), and make the calls to the Gemini API.
requirements.txt: This file lists all the Python libraries our project depends on. It’s essential for sharing the project with others, as they can install all the necessary dependencies by simply running pip install -r requirements.txt. For this project, it will include Flask and the google-generativeai library.
.gitignore: This file tells Git which files and folders to ignore when committing code to the repository. This is important for keeping our repository clean and secure by excluding temporary files like .DS_Store and log files, which don't need to be tracked.
README.md: This is the project's documentation file. It contains important information about the project, how to set it up, and its purpose.
This structure provides a clean foundation for building the backend logic to integrate the Gemini AI chatbot, ensuring a smooth development process.
Step 2 - Get API Keys for Googles Gemini Model (Flash 2.5)
Now that we understand the project structure, the next crucial step is to get the necessary access to Google's Gemini API. This API key will allow our Flask application to send requests to the Gemini model and receive responses.
Navigate to Google AI Studio: Open your web browser and go to Google AI Studio. You will need to sign in with your Google account.
Access the "Get API key" section: Once you are on the platform, look for the option to "Get API key" in the left-hand navigation menu.
Create a new API key: Click the "Create API key in new project" button. This will instantly generate a unique, long string of characters.
Copy and Secure the Key: Copy the generated key. It is crucial to store this key securely. Do not share it publicly, and never commit it directly to your code or a public repository like GitHub. We will use it as an environment variable in a later step.
For this project, we'll be using the Gemini 2.5 Flash model, which is an excellent choice for chat applications due to its speed and efficiency.
Step 3 - Initialize the API Client and Connect our Backend to the Gemini model.
With our API key in hand, we can now begin writing the Python code to integrate the Gemini model into our Flask application. We will modify app.py to handle chat requests and communicate with the Gemini API.
1. Import Necessary Libraries
First, we need to add the necessary imports to the top of our app.py file. We will need Flask for our web framework, request and jsonify to handle API requests and responses, os to securely retrieve our environment variable, and genai to interact with the Gemini API.
import os
import google.generativeai as genai
from flask import Flask, request, jsonify
2. Configure the API Client
Next, we will configure the Gemini API client using the API key we stored as an environment variable. We'll add this code snippet after our imports but before our route definitions.
# Configure the API client with your API key
# Ensure you have set the GEMINI_API_KEY environment variable
genai.configure(api_key=os.getenv("GEMINI_API_KEY"))
3. Create the /chat Route
Now, let's create a new route in app.py called /chat. This route will listen for POST requests from our frontend. When a user sends a message through the chatbox, it will be sent to this endpoint.
# Initialize a Gemini client instance
client = genai.GenerativeModel(model_name="gemini-1.5-flash-latest")

@app.route("/chat", methods=["POST"])
def chat():
    # Get the message from the request JSON
    user_input = request.json.get("message", "").strip()
    # If the message is empty, return an error
    if not user_input:
        return jsonify({"error": "Message is required"}), 400

    try:
        # Generate a response using the Gemini model
        response = client.generate_content(
            f"Dont greet: {user_input}"
        )
        # Return the generated text as a JSON response
        return jsonify({"reply": response.text})

    except Exception as e:
        # Print the error to the console for debugging
        print("Gemini API error:", e)
        # Return a JSON error response
        return jsonify({"error": str(e)}), 500
This new code snippet will take a user's message, send it to the Gemini model with a specific persona, and return a generated response. We've also included basic error handling to ensure our app is robust.
Step 4 - Link Our Frontend to the Backend Endpoint
The final step is to make the connection between our frontend (the chatbox in index.html) and the backend logic we just created in app.py. This is done using JavaScript and the fetch API. We will create an asynchronous function that sends the user's message to the /chat endpoint and then handles the response.
1. Add the JavaScript Function
In your JavaScript file (likely located in static/js/), you'll add the following function. This function will be triggered when a user sends a message.
async function getBotReply(inputText) {
    try {
        // Send a POST request to our Flask backend's /chat endpoint
        const res = await fetch("/chat", {
            method: "POST",
            headers: { "Content-Type": "application/json" },
            body: JSON.stringify({ message: inputText })
        });

        // Parse the JSON response
        const data = await res.json();

        // Return the bot's reply or a default message
        return data.reply || "No reply received.";
    } catch (error) {
        // Log the error to the console for debugging
        console.error("Error fetching bot reply:", error);

        // Return a user-friendly error message
        return "Sorry, I'm having trouble with the connection right now.";
    }
}
This function takes the user's message as inputText, sends it to the Flask server, and waits for a response. The try...catch block ensures that any network errors or issues with the server are handled gracefully, preventing the chatbox from breaking.
You will then need to call this getBotReply function from your frontend's event listener (e.g., when the user clicks a "Send" button or presses the Enter key). The function's returned value can then be used to display the bot's reply in the chatbox.
By completing these steps, you have successfully integrated a powerful AI chatbot into your website. The frontend sends messages to the backend, which processes them using the Gemini model and returns a response, all while maintaining a clear and organized project structure.
This tutorial focused on integrating a Gemini-powered backend into an existing website with a pre-built chatbox. If you're interested in learning how to build the frontend and backend of a chatbot from the ground up, check out our next article:
Conclusion
Congratulations! You've successfully completed the first step in creating an AI-powered website. By following a clear, modular approach, you were able to seamlessly integrate the powerful Gemini model into an existing Flask application. This foundation allows for endless possibilities—from adding advanced conversational features to building more complex, interactive AI applications. We started with a basic project structure, secured our API key, and wrote the core backend and frontend code to make our chatbot functional. This process not only gave us a working application but also provided a deeper understanding of how modern web applications can leverage cutting-edge AI technologies. Now that you have this crucial piece in place, the path is clear for enhancing your chatbot with features like conversation history, user authentication, or even the ability to handle a wider range of queries by fine-tuning the model's behavior. Keep experimenting with the API, and get ready for our next hands-on section!


